Pistol Draw and Presentation


We are continuing our discussion about the shot process. Specifically, we will be addressing the shot process as it applies to the pistol. As mentioned previously, there is a new Pistol Manual for the Army. It is TC 3-23.35 (Pistol), and it will be our reference for this discussion.
One of the Major changes made in this new book is the addition of the steps for drawing a pistol. There was no mention in the previous book how to do this, and as a result, it was not trained consistently.
An efficient draw allows crucial seconds to refine aim. The draw is the manipulation by which a shooter removes a pistol from its holster, and presentation is the manipulation by which a shooter drives the pistol to the target. The transition between these two actions is fluid and seamless; their purpose involves removing the pistol from the holster and bringing it to bear on the target as quickly as possible.
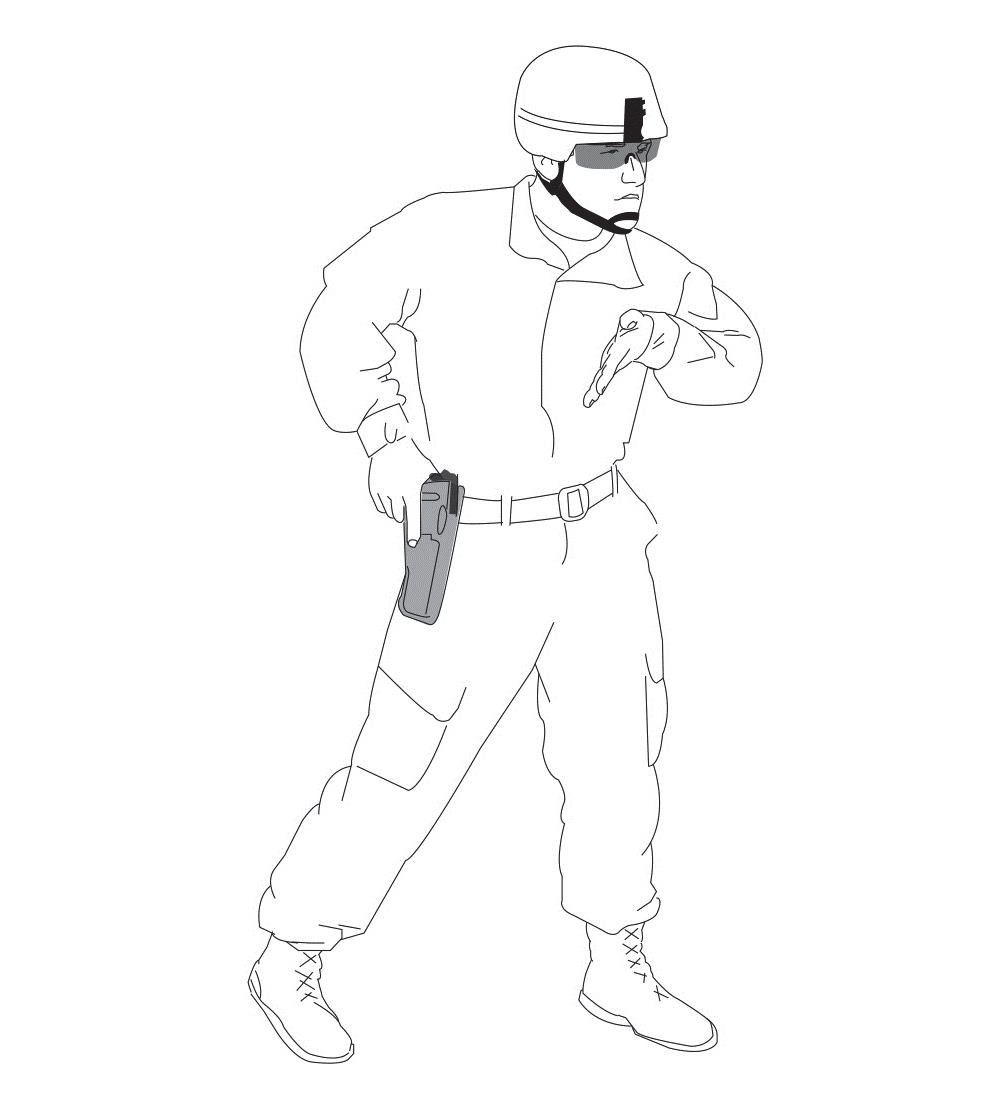
The attached pictures illustrate the five steps of the draw and presentation. They are: Prepare to Draw, Grip and Defeat, Draw and Rotate, Meet and Greet, and Extend and Prepare. We will discuss each of these in turn.
In the prepare to draw, the Paratrooper does the following: Moves their hand to the pistol, establishes a high, firm grip, prepares to defeat holster’s retention device, the non-firing hand is anchored to the body in preparation to receive the pistol. They assume a correct stance, placing the feet about shoulder’s width apart, with a slight bend the knees, and place their weight on balls of the feet. Picture two illustrates this
The next step, Grip and Defeat, takes place after acquiring a grip on the pistol. The Paratrooper then defeats the holster’s retention device and swiftly extracts the pistol from the holster in a straight upward motion. Picture three illustrates this
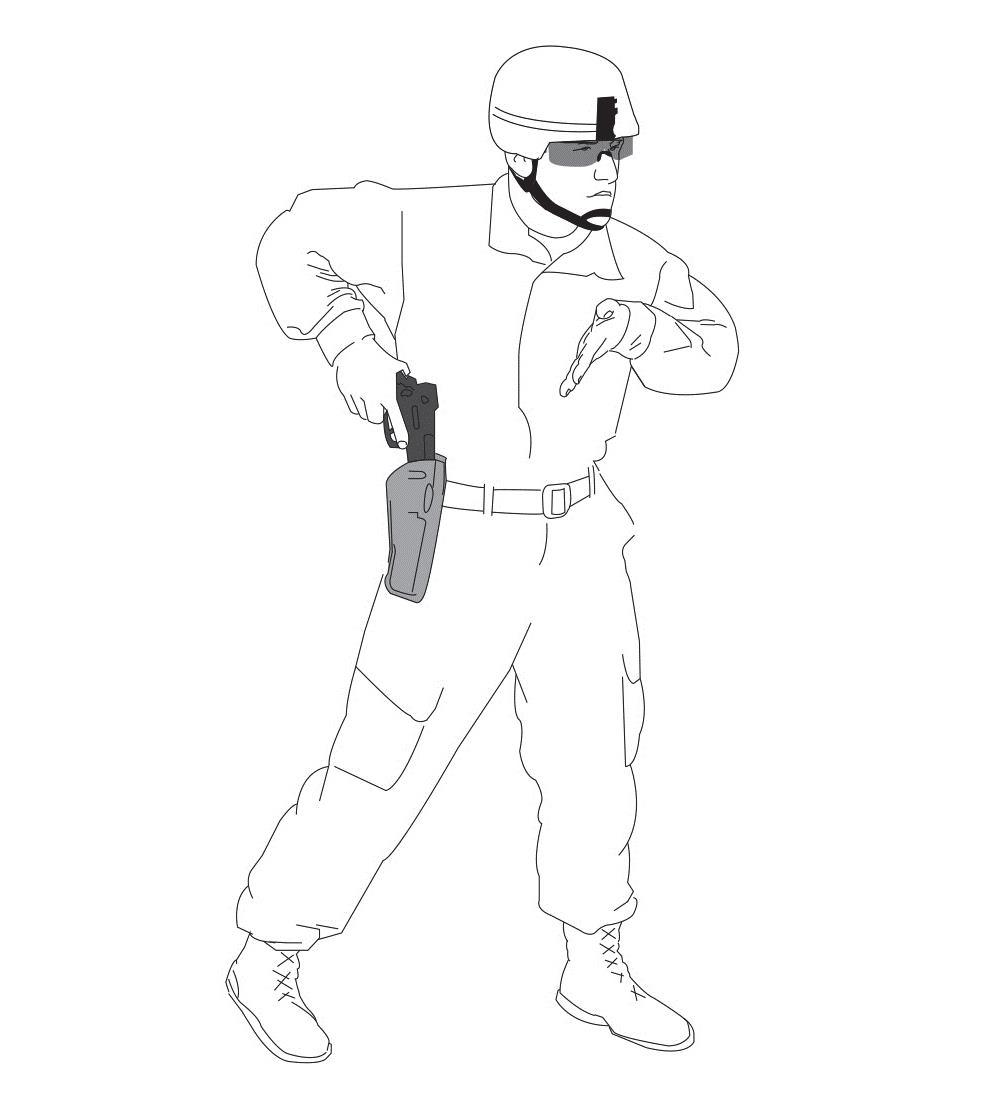
The Paratrooper then moves into the Draw and Rotate step as soon as the muzzle of the pistol clears the holster. The elbow of their firing hand is dropped while simultaneously rotating the pistol to orient the muzzle toward the target. Move the non-firing hand into position to support the pistol. Picture four illustrates this.

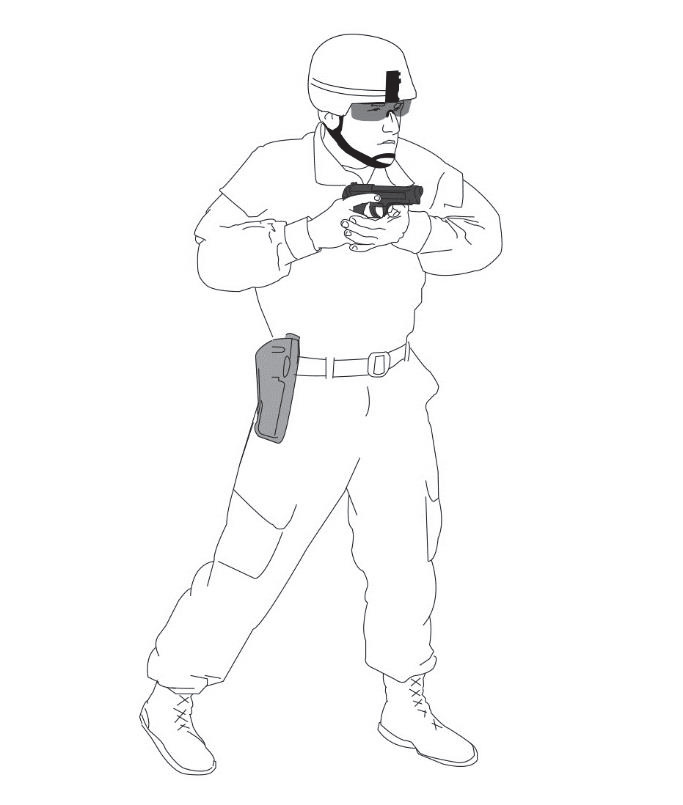
The next step, Meet and Greet, takes place when the paratrooper’s hands meet approximately at the center of their body. They slide the fingers of the non-firing hand under and against the trigger guard. Rotate the non-firing hand so that the heel of the non-firing hand is against the pistol grip, resting between the space provided by the fingers and heel of the firing hand. Ensure the firing hand is high on the pistol grip with the finger off the trigger. The last step at this point is defeating the safety mechanism of the pistol. Picture five illustrates this.
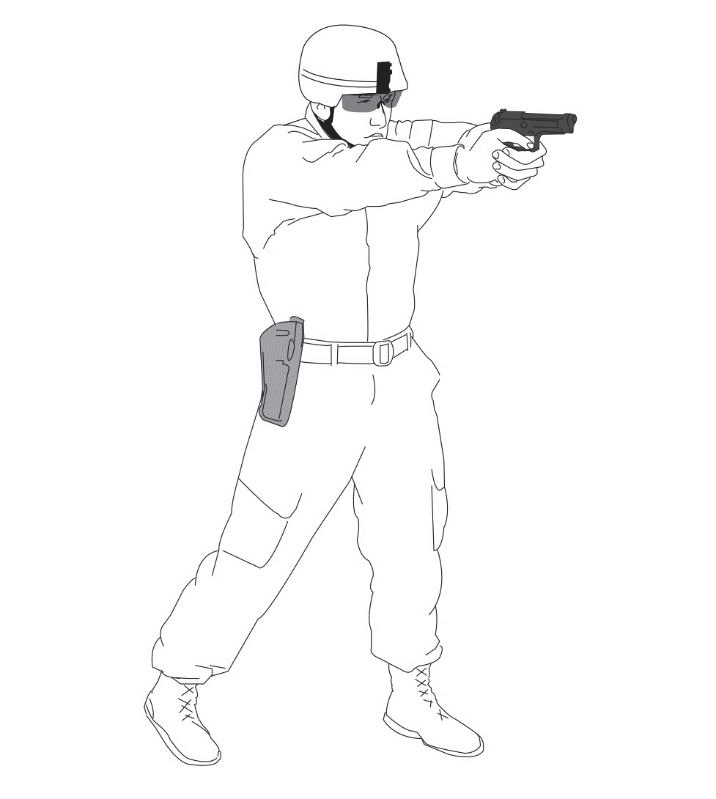
The last step, Extend and Prepare, takes place when the Paratrooper brings the pistol up to their sight line (sight line is when your sights and target are aligned). The Paratrooper needs to ensure the following: Ensure the thumb of their firing hand is on top of their other (non-firing) thumb. Lockout their non-firing hand’s wrist. As they are pushing the pistol out, prepare the trigger.
At full presentation, the Paratrooper needs to ensure they have the following:
(1) A high, firm grip.
(2) Correct sight alignment.
(3) Correct sight picture.
(4) Proper stance.
Picture six illustrates this four us.
A Soldier can disengage the safety at various points during draw and presentation. Picture seven shows methods for defeating the safety. The figure below is in no specific order.

An important feature of the M9 service pistol is that it is safe to carry the pistol with the safety/decocking lever in the up (off) position. The M9 service pistol is designed so it will not fire unless the trigger is pulled. Local leadership will make the decision for their Soldiers about the position of the safety/decocking lever while the pistol is in the holster.
So to sum up, Pistol Draw was not addressed in the old Manual, There are five steps to the draw: Prepare to Draw, Grip and Defeat, Draw and Rotate, Meet and Greet, and Extend and Prepare. The safety can be defeated at various stages of the draw but needs to be trained consistently. And the decocking lever of the M9 does not have to be down for the weapon to be considered safe, as long as it is not in single-action mode (cocked). Next week, we will begin our discussion on stability.
#weaponsmastery #pistolshotprocess
Comments
So empty here ... leave a comment!