AAR CSAT Tactical Pistol/Rifle Course - 2014-05-10/11 - Nacogdoches, TX

Default.mp3

Established
I apologize ahead of time for any vagueness, omissions, or mistakes in the AAR, as my notes are a bit incomplete, as a large amount of discussion arose organically and not as a set part of the class curriculum.

This class focuses on the tactical employment of the sidearm. The class will focus on the following:
  • Safety
  • A stair-stepped shooting program that covers all the basic skills needed for surgical shooting.
  • Discrimination
  • The use of cover
  • Transition drills
  • Realistic time and accuracy standards will be used as a training standard and goal.
  • Individual shooting plans will be developed and used.
  • Shooting “work out” plans for future individual development will be taught.

This was my first course with carbine instruction of any kind. I had a small amount of prior knowledge simply through online reading and informal shooting events with well-versed acquaintances; I have also taken multiple pistol courses from various well-regarded instructors, along with some edged weapons work.

For the pistol portion of the class, I used an H&K P30LS with the Grayguns Reduced Reset Carry Perfection Package carried in condition 1, with an X400 Ultra - Green laser mounted with the DG-11 and zeroed for 25 yards. Sights were Heinie Straight Eights with the front sight painted bright orange with Revlon Colorstay nail enamel. Lube was SLIP 2000 EWL, magazines were modified with the Taylor Freelance Border Special +5 magazine extensions with the included Wolff springs. Round count was at 9536 at the start of the class.

For the carbine portion of the class, I used an AR-15; the upper was assembled by Weapons Outfitters (Centurion Arms 16" light-weight midlength barrel cut down to 14.5", MicroMOA Govnah, Vltor MUR-1S, Noveske NSR 13.5, Centurion Arms FA BCG, WOA gas tube, Surefire SF3P, AXTS Raptor), while I personally put together the lower (AXTS AX556 lower with mostly LWRC small parts, Vltor A5 RE and H2 buffer, Geissele SD-C, Magpul ACS-L, IKH SLAP, BCM Mod 1 Grip, BAD ASS, Sprinco Green Spring). Accessories on the rifle were as follows: Surefire M600 Ultra with an SR07 on an IWC Keymod Thorntail, Aimpoint T-1 2MOA on a GDI MT6-OSM with TD iO, EOTech G33, KAC 600m Micro BUIS, IWC Keymod QD sling mount, Magpul RVG attached via PXT Low Profile Keymod rail section, SOB QD Bitch sling, Surefire SOCOM556-RC, Magpul rail ladders, and Noveske Keymod rail panels. Lube was FIREClean, magazines used were Magpul PMAG MOEs and Lancer AWMs, with Magpuls mounted sideways. Round count was at 578 at the start of the class.

Since the usage of the carbine was unlikely in my EDC attire, I did not attempt to run the course in my EDC set-up, and instead opted for a battle belt. I used a TYR Tactical XFrame Brokos belt with their Assaulter's Base Belt-Tail and Emdom-MM Battle Suspenders. Attached to the battle belt, from the left side moving counter-clockwise, were two ITW FastMag Pistol, two ITW Gen3 FastMag, EGL Loppy Dump Pouch, a Gear Keeper retractable pistol lanyard, and a Safariland 6004-39512 with DFA.. Dress wise, I was fairly close to my EDC attire, besides the addition of Outdoor Research Firemark gloves and Arc'teryx kneepads. Eye pro was Oakley Ballistic M-Frames 3.0, ear pro was MSA Sordin Supreme Pro-X with the gel earpads and OC Tactical headband.

Paul Howe was the primary instructor, with 10 other AIs. Class started at about 0745. Weather was fairly warm and humid, but cloudy and with minimal wind, so decent training conditions for May in Texas. There were approximately 20 students in the class, mostly shooting Glocks, a couple of M&Ps, 3 H&Ks, 2 XD family pistols, and a 1911 when it came to pistols; for rifle, there were 2 AKs, the rest were all AR patterned rifles, mostly DI, but at least 2 LWRC, a KAC SR-15, a couple of SBRs, and two suppressed rifles (including one DD MK18 upper). Gear-wise, everyone ran their pistols from the open, and at least half were running retention holsters of some sort. Some were running battle belts, and a couple ran full plate carriers on the second day, with the carbine. The AIs shot similar guns, mostly Glocks, a couple of M&Ps, a 1911, and a Sig, and all ran ARs for rifles. Gear was similar to the students, all open carry, several battle belts, and even a couple of PCs.

The class started out with Paul having us fill out some paperwork. After that, he then passed out a sheet of standards, drills with the maximum amount of time allowed on them. These standards can be used as baseline drills, as it can show where one is weak and needs additional focus on. Also, this class is part of the 6 day carbine/pistol instructor course; the last two days are used for those taking the instructor course to have an actual class to teach, thus the 10 AIs. This is notable because this allows Paul to pair instructors with students in a way that maximizes information flow, such as left-handed instructors with left-handed students, or 1911 using instructors with 1911 using students. The same AIs are paired with the students through the whole class, so there isn't any conflicting advice.

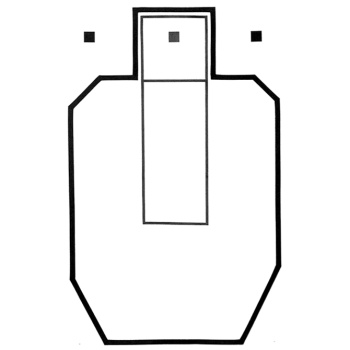
Paul then went over the structure of the class. Hydration was stressed, given the weather here in Texas at this time of year. Also, the range was set up so that the students could simply work out of the back of their vehicles, rather than having to set up tables or the like. Beyond that, Paul runs a cold range during class. He also stressed that once one takes a course with him, the student is free to contact Paul via email for any kind of question, and he would generally respond within 24 hours, depending on his workload at the time. As for the instruction itself, generally a drill would be explained by an AI with everyone circled up, then demoed three times (slow to show the mechanics, then run normal speed, then slow again) by another AI, then the students shoot the drill. The vast majority of the drills were run with 24 rounds (8 rounds in three magazine), and utilizing this target:


We then headed out to the line. Before starting the first drill, Paul touched upon the SERPA; while he doesn't ban the holster at his class, he stresses that the retention must be defeated with a straight finger, rather than a curved finger, in order to prevent the trigger finger from slipping onto the trigger during the draw. For the Safarilands, there are two methods, coming in on top, or grabbing the holster and moving the hand up to the master grip. He also stressed that there is no reason to speed holster, as one would holster only if there was no more threats left. He liked to utilize the modified iso as his stance, a slight lean forward, with his feet heel-to-toe, which is to say, the weak side foot is slightly forward, so that the heel of the weak side foot is in line with the strong side foot's toe. The arms should both be locked, so the natural point of aim should be achieved via moving the feet, rather than the arms. The weak hand should be as high up on the gun as possible, striving to be the same height as the strong hand, so that the recoil will be neutral. If searching and needing to pivot, Paul usually floats the leading foot.

When Paul starts in the high ready, his muzzle is slightly elevated. This is to help him pick up his front sight as he extends, as he allows the front sight to sink into the rear notch during extension. Generally, he has a loose grip in the high ready, and firms up his grip only upon reaching full extension. He also likes to take up the slack as he's extending, stopping at the wall of the trigger until he reaches full extension, at which time he breaks the shot. For most slide manipulations, Paul likes to powerstroke, as this keeps things simple; the same action can be used for reloading, press checking, malfunction clearing, etc. While one can use a slide release, Paul notes that many guns have slide releases too small to be easily used while wearing gloves, a great concern of his; however, if one is able to do so, then he has no issues with it. A simple test for eye dominance determination is to simply put a thumb over a designated target, then closing one eye to see if the thumb is covering the target still. As for questions about both eyes open versus one eye open, Paul states that for shooting, it doesn't really matter, one just has to remember utilize both eyes during the search phase.
 

Default.mp3

Established
Paul then quickly went over the routine for loading and unloading, in order to facilitate a cold range. When loading, put the mag in, pull on it to make sure it's seated properly, press check, then holster. To unload, remove the magazine and stow it, eject the round in the chamber, and let the round fall to the ground. If one has magazines and rounds behind the firing line, one can pick them up, provided that one checks left and right to make sure that no one would muzzle them while doing so. Otherwise, step back from the line to allow Paul to know when one is done with the drill, and pick up empty magazines and loose rounds after the range is cold.

On a quick note on drop-leg holsters, Paul stated that his trick is to see if one can reach the bottom of the holster without any bending or dropping of the shoulder; if one can't, the holster is clearly too low. Also, he noted that gloves tend to degrade one's abilities by about 20%.

I passed the drop-leg height check with no issues, as I had my DFA set up so that the holster would be riding as high as possible. I had attempted to mount the holster onto my war belt using the MLS 15, but that brought the holster way too high for me to be able to draw. As for the gloves comment, I was curious to see what my performance for the day would be, since I planned on running the gloves the whole time, as I did not foresee myself ever utilizing the battle belt set up without a carbine, and thus without gloves.

In the post-shooting assessment, Paul liked to check left and right of the target with the pistol at extension, before going back down to the target. After that, he goes into the high ready, and does a full scan and assess. For the purposes of the class, the students were to check the target one the left and to the right of the target engaged, before checking the ground in front of the target. Paul notes that this is a calculated risk, as the threat that went down may still be a threat, but the assumption is that if they went down, the target is probably at least temporarily incapacitated. Also, this procedure helps break any tunnel vision that might have occurred. This act was to be done after each iteration of each drill, and the AIs did a good job in point out when a student failed to go through the post-shooting assessment.

As for thumb safety manipulation with a pistol, Paul swipes it off as soon as the extension starts, along with any kind of movement, coming back to high ready, etc.; essentially, any time there is no shooting.

We then started the first drill of the day. One is suppose to place the front sight blade right below the top left square pastie, so that the top of the front sight blade touched the bottom of the square. One then dry fired five times, then one live round. The goal of the dry fire is to make sure the sights were not disturbed, along with noting the POA/POI of the pistol and ammo.

My AI, George, suggested that I change my stance a bit. I had my feet exactly parallel to each other, and he suggested that I try moving the strong side foot back a little; this is a little ironic, given how I used to have the bad habit of standing with my strong side foot too far back. However, George was able to illustrate that having my feet exactly parallel was not the most stable platform, as it's relatively easy to push me off balance. It was also suggested that perhaps I lock both my arms and have them on an equal plane, rather than having them slightly bent with the strong arm slightly lower; I didn't really like that suggestion, because it would break my weak side wrist a bit.

After the drill, Paul noted that thumb-cocking, whether a DA semi-auto or a revolver, was undesirable, as that defeats the whole point of consistency in manipulations. By that same token, Paul is also not fond of DA/SA handguns, as that means that the shooter will need to master two distinct trigger pulls. Also noted was that one of the XD patterned handguns had locked up hard on this drill, and the student was now shooting a loaner Glock from Paul. Paul also touched upon his three ready positions: high, SUL, and holstered. High is used as the default position if the gun is out, SUL only when trying to move around friendlies, and holster for anything not requiring the pistol out.

Next up was the line drill, which is suppose to show a student just how hard they are suppose to grip the gun. One of the biggest issues for many shooters is the tendency to overgrip the gun, and thus push it one way or the other. Instead of muscling the gun into the proper position, Paul prefers to rely on a natural point of aim to do the majority of the indexing work. By shooting along the thick black lines that form the vertical boundaries of the target, one can see if grip pressure needs to be modulated, via the feedback generated from the groupings on the line. Paul stressed that each shot should have two sight pictures: one at the beginning, and one after the shot, as part of the follow through. Paul does not advocate strictly riding the reset, nor does he take his finger off the trigger, but instead a happy medium, where the trigger does end up with some slack again, but the trigger finger never leaves the trigger.

I did not really grok this drill; the whole grip pressure thing has long been a confusing one, and for now, I just grip as hard as I can without disturbing the sights, without regards to how to split the grip strength. I was able to keep the rounds on the lines fairly well, so I guess I was already applying proper grip strength?

The next drill was a single shot to the spine box from the high ready. With the introduction of a speed component, Paul stressed something that he would go to say almost every drill: speed stops when accuracy stops, which is to say, once one throws a shot out due to pushing one's self too fast, slow down a bit, and insure a good hit.

For this drill, I had my first malfunction of the day: a failure to extract. However, I do not believe this was an issue with the gun, so much as the ammunition used, which was Russian steel cased 9mm (Monarch, manufactured in Barnaul), as the empty casing was so locked up in the chamber that I had to field strip the pistol and use a pair of pliers to get enough purchase to pull it out. Later, I checked to see if the emptying casing would easily drop into the barrel, and it would not, requiring quite a bit of force to push the slide into battery, and requiring pliers to pull it out again. I switched to brass cased ammo at this juncture. I had not cleaned my pistol before this class, and as I recall, potential reliability issues can occur when switching between brass and steel without any cleaning, due to residue build-up and the different thermal expansion coefficients between the two materials. As for the drill itself, I did not have much issue with it, besides throwing one shot; the gloves certainly make a small, but noticeable difference in my shooting, due to the reduction of tactile feedback. I also started to get familiar with the way Paul wanted us to scan and assess, which I think is a bit more thorough than the way I used to do it.

Paul then went over the three types of reloads. The first is the admin reload, which is done with the gun holstered, and one is just swapping out the magazines. Paul stressed the need to press check to make sure that the gun is, in fact, loaded, each time the gun is expected to be drawn. There is also the tactical reload, which is done on one's own time, assuming that there is a lull in the fight. The magazine used to top off should always be the one furthest away from the first reload point. The retained magazine is then either put into the pouch where the top off magazine was, or else in a pocket; never place it in the first reload pouch (unless one only has one). Finally, there is the typical speed reload, which one does when at slide lock. When this occurs, hit the magazine release, and allow gravity to do its work and have the magazine fall out on its own; the weak hand should already be going toward to the magazine pouch, generally starting at the middle of the belt and moving back toward the pouches. After the magazine drops free, turn the magwell toward the direction of the pouch from which one is reloading from. It is preferable to take one's eyes off the target and look at the gun during the speed reload, to minimize any bobbles in the reload procedure. After inserting the magazine, Paul prefers to use the powerstroke, for consistency reasons and the fact that slide releases can be difficult to hit when wearing gloves, though he does not see any issues with using the slide release if one is able to do so consistently. Whenever possible, such as during a lull, remember to move a full magazine to the pouch one reloaded from. As a tip, if one is running a compact pistol that also has a pinkie rest on the magazine, and the magazine generally does not fall free, one can use the weak hand pinkie to strip the magazine out when taking the hand off the pistol. At this point in the class, we were to reload during a drill whenever our gun ran dry, without further instruction.

The drill shot next was 2 shots from the high ready, thus introducing the importance of follow through and speed. It is important to note that this is not a double tap, where two shots are fired with only one sight picture. Instead, for each iteration of the drill, one should see three distinct sight pictures. The first two magazines were run as practice, while the last magazine was timed.

I did not have too much issue with the drill, provided I didn't push my self extra hard.
 

Default.mp3

Established
For malfunctions, Paul teaches the classic "tap-rack-bang". For the next drill, one would start with an empty chamber and a loaded magazine, fire on the empty chamber, and then tap-rack-bang, and fire the live round. This can be done both extended, or back in the workspace, depending on one's physique and abilities. Paul has not seen much reason to roll the ejection port side of the gun outward to try and aid in ejection, as any time a simple rack failed, gravity would not have helped any, while at the same time, rolling the gun out weakens the rack.

After that drill came the 5-1 drill, which Paul had adapted from Jerry Barnhart. In this drill, starting from the high ready, one puts 5 rounds into the spine box of the target, then 1 to the head, and getting 7 sight pictures total during the drill. Paul states that if one has to get into a more aggressive than normal stance in order to maximize recoil control, that should become one's default position. It was also noted that there are two advantages to shooting higher up on COM, rather than too low: the first is that it's a faster transition to the head, the second is that shots below the diaphragm are generally much less lethal, as the soft organs there are generally not as critical as those above the diaphragm. Also, because of the multiple shots, one can't cheat with poor grip, as that quickly exposes itself in the multi-round strings; if one is utilizing a good grip and still doing poorly, consider stepping down in caliber.

I found that my gloves would sometimes ride a bit high, and make me ride the slide release, thus not allowing the slide to lock back on empty; I will have to work to get a more consistent grip with the reduced tactile senses. Also, I had 2 fliers, both times on the second shot in the drill; George reckoned that I was double tapping rather than doing controlled pairs.

After the drill, Paul noted potential problems with over-penetration, and how one might drop to a knee and shoot upwards in order to try to put the round into the ceiling after it goes through the target. Another thing he touched upon was caliber choice; Paul is known to be one of the few reputable instructors to use .357 SIG, which he states arouse mainly from the fact that he had a large stash of it. However, he also notes that the harsher recoil means that he can't be sloppy during practice, which is useful to keep him on his toes. Also, if the pistol is his only weapon, he likes a weapon to have a bit more gas. Still, he generally carries 9mm if it is a secondary for a rifle, and stated that he wouldn't feel under-gunned if he carried that by itself.

At this point, 1116, we broke for lunch.

After lunch, Paul went over the basics of Sul. There are three basic ways to run Sul, the first of which is to cross the thumbs, which is Paul's preferred method. The thumbs then becomes an index point, and allows one to get into a two handed grip easier. The second method is to put pads of the thumbs against each other. Again, the thumbs act as an index point, but the weakness here is that the gun generally doesn't lay as flat against the chest, and is thus a little less safe if one doesn't pay attention. The last method is the "C-clamp", where the weak hand actually grips the gun, with the webbing between the thumb and the index finger being pressed up against top of the slide. This is used for retention purposes, such as by FAMs, but lacks an index point, and is thus generally slower to come up on target with.

We then had a multiple target drill; two targets, each serviced with two shots. Paul stressed that one transitions the eyes first, then brings the gun in line with the target. Also, he notes that when transitioning between threats, in real life, there may be innocents, such as other civilians or even family members, that were between threats. While muzzling them may be inevitable given the time constraints imposed, one can still at least take the finger off the trigger during the transition.

I was able to do okay on this drill, and was able to remember to keep my finger off the trigger after two or three transgressions.

Paul then gave us a little tip he liked to use for new students. Have the student get a good grip on the gun, then, using a marker of some sort, draw a line from one thumb to the other. Now, when the thumbs are out of alignment, the student has instant feedback and can self-correct. He also demonstrated just how much material is needed to stop a bullet, buy having a student shoot into the ground (about 4 inches of sand). The point illustrated here is that, when loading, one must consider whether or not the object acting as a backstop would actually stop the bullet.

The next drill was 2 SHO shots, and then transition the gun into the weak hand, and do 2 WHO shots. It was stressed that this drill was simply to show people the basic mechanics, and not run for speed. If one drops the gun, just let it go, don't try to grab at the gun. This drill was to be done dry first, then live. Generally, there are two ways to transition from the strong hand to the weak hand. The first way is to rock the strong hand down, creating a gap on top of the webbing between the thumb and the index finger on the strong hand, and the weak hand goes over. The second way is to open up the strong hand thumb, and let the weak hand come in from the side. As for the grip itself, Paul prefers to keep the gun straight up and down, rather than canting the gun slightly, but states that one should do whatever generates better results.

I had some issues with the transition from the strong hand to the weak hand, mainly in the sense that the weak hand would be too far to the left a bit, making it difficult to take the safety off and inducing poor recoil control; I normally don't really have this issue without gloves, so it'll be something I'll have to practice more. I also wound up throwing a couple of shots on the weak hand.

The next drill was to start in an interview position, then draw and fire one shot at the target. At this point, some of the students will also be running ball and dummy drills with this drill. Typically, to speed up the draw, one can speed everything up from coming out of the interview position to putting the hands together, but the extension should be the same speed. For reholster, Paul states that if one misses the first reholster attempt, look at the holster to reholster; this is not an issue from a situational awareness POV since one would holster only if there were no immediate threats. This drill was done dry first, with one-on-one assessments by the AI to determine if the student could do this drill safely.

It was good to get practice in with the SLS. I bobbled defeating the retention once or twice, but was fine for the most part.

The next drill was a simple shoot twice, reload, then shoot twice again.

I had switched back to steel after lunch to see if that one round was just a fluke. It wasn't. My gun locked up hard again, with the casing stuck inside the chamber, unable to be fixed with a rip drill, and had to be removed with pliers again. I switched to brass for the pistol for the rest of the class. As for the drill, it was interesting to get used to the tension on the FastMag Pistols, as it was much more than my open top CC mag carriers that I've used in the past.

After that, we went over the 25 yard kneeling. Here, we were instructed to shoot right at the bottom of the spine box, with the front blade sight right on the line. There are four basic kneels, the first of which is the Hollywood, in which one drops down on both knees. The torso should be in the same position as if one was shooting standing. To get back up, put one foot forward, and then push back with that leg to stand up. In the supported kneel, one puts the weak leg forward, and rest the weak elbow on the knee, getting bone-on-bone support. In the unsupported kneel, one still puts the weak leg forward, but has the torso be in the same position as if shooting standing. In the drop-down kneel, on puts the strong leg back, instead of putting the weak leg forward. The type of kneel one chooses is dependent on one's comfort and abilities, taking into account body size, build, prior injuries, etc. We ran this drill dry for awhile, so that each student can figure out which kneeling position they like the most.

The kneepads here were quite useful, as it meant that I didn't have to watch out for empty shell casings or rocks. I did not shoot as well as I liked; I chose the unsupported kneel and the drop-down usually, but did not really find much increased stability compared to simple standing; perhaps a familiarity issue?
 

Default.mp3

Established
The class then split into two groups, one doing the surgical shooting combined with moving around people Sul, while the other half went off to shoot steel around barricades and practice tactical reloads. I was assigned to surgical shooting while using Sul.

Each surgical drill would be run individually, and the first run would be dry. It was stressed that there was no emphasis on speed, but a huge one on safety and accuracy. Every other target had a person that one had to go behind in order to get to the next posted target (of which there was four); each posted target had 6 sub-targets, 5 of which depicted hostage situations (and each on with the hostage taker showing less and less of himself). Each student was to engage each sub-target once, then move into the next position in Sul. Upon finishing the run, the student would switch spots with someone who was standing as a barricade.

It was noted that no one did a tactical reload between moving, which is poor ammo management; I personally did not do so since I knew the course of fire and knew I would have enough rounds, but I suppose that's not really a good attitude to have in this kind of scenario. I had good shots on my targets, although many sub-targets had the hostage with quite a few holes. It was stressed here that, if one doesn't have a shot, it's better to simply not shoot from that position; instead, change the angle so one can. For example, one could engage the leg of the hostage taker, and once the hostage taker is down on the ground, put in the lethal shots.

We then moved over to the barricade side of things. Paul went over the three basic ways to engage from a barricade. The first is to simply flow out all the way from behind the barricade; this is not preferred, as this means abandoning cover. The second is to slowly pie out; this has the issue of potentially telegraphing one's move, as the feet may show before one clears the barricade. Finally, there is dynamic, where one simply steps out just enough to clear the barricade. The drill would be run dry first, then live twice, against narrow steel targets about 25 yards away, utilizing the standing and kneeling, on both sides of the barricade (so 8 total engagements). Because most targets take more than one round to take down, we would engage until we hit the target twice in each position (AIs would call out the location of a miss). When kneeling, the side that one is going to go out of is the leg that should be forward. In terms of leaning, this is a viable tactic, but only if one isn't too top heavy, which is an issue for those wearing armor. If doing a tactical reload, Paul prefers to stay aggressive and reload out of cover, as this allows him to keep scanning for threats and making sure that the threat already engaged stays down (since a tactical reload would occur only after the threat is done). If a new threat emerges before he is done reloading, he can simply dart back into cover.

I did a bit of leaning while kneeling, as this is how I was taught previously, and since I was running slick. I had a couple of misses, usually to the right of the target, which was disappointing. On the left side, kneeling had a weird tension, since I'm shooting right-handed.

After everyone had a chance to run this drill, we moved on to tactical reloads. As noted earlier, the magazine used to top off should always be the one furthest away from the first reload point. The retained magazine is then either put into the pouch where the top off magazine was, or else in a pocket; never place it in the first reload pouch (unless one only has one). Interestingly, Paul teaches that the fresh magazine should be between the ring and middle finger, and that the magazine being extracted should be pulled out with the index finger and thumb. One can still index the fresh magazine as normal, before shifting the magazine to the proper placement, and by extracting the old magazine with the index finger and thumb, it is far easier to put into a magazine pouch. This drill was run completely dry, with no rounds in the chamber, albeit with rounds in the magazines.

The new tactical reload format was somewhat awkward due to lack of familiarity, but once I realized the reasoning behind it, I found it to be superior to how I had previously done it (with the magazines in reversed spots). Also, the magazines were a bit difficult to seat, if only because of how full they were; downloading by one would have solved that issue.

Class ended at this time at around 1610.
 

Default.mp3

Established
Class started at 0800 on TD2. Weather was again warm and humid, with alternating bouts of clouds and sunshine. There was also more wind than yesterday, although it was only sporadic.

In order to run a cold range, chamber flags were handed out. The procedure for loading would be, after the order was given, simply yank the chamber flag out, and store it somewhere on one's body. Insert the magazine, pull on it to make sure it's seated properly, charge the gun, then pull the charging handle back to check for brass. Let the BCG forward under it's own spring tension, then palm the forward assist to make sure the bolt is fully seated. To unload, lock the bolt to the rear, and let the round simply fall out. Eject the magazine and stow it, put in the chamber flat, then ride the bolt home. Take two steps behind the line to show that you are clear. Recover your round once the line is cold. Paul preferred to load his magazines to 28, so that they were easier to seat. Also, low ready would be used throughout the course. High ready has the issue of blocking one's vision, and while quite useful in its original context of bird hunting, humans tend to be ground-based.

I did not particularly like Paul's method of chamber checking, as I had a habit of pulling the charging handle a bit too much, and thus ejecting the round. Perhaps it'll get easier with practice, but I didn't really see an advantage over simply ejecting the magazine and checking to see if a round had been stripped.

We started out at 7 yards to get a very basic zero. Aiming at the bottom of the pasties, we were to try to see if we would be about 2.5 inches right below the pasties, and adjust for any gross offsets. For red dots, Paul recommended using the very top of the red dot as the zero point. Paul stated that he preferred to use the 100 yard zero, as even out to 200 yards, there is only a minimal amount of dropping (about 2 inches), while 300 yards is still acceptable (IIRC, around 7 inches?). Using the 50 yard zero can be lazy, as being slightly off at 50 yards amplifies the issue at 100 and 200 yards. Also notable is the use of the CSAT rear sight, which has both a notch and an aperture. The notch is essentially like a rear pistol sight, and should be POA/POI at 7 yards, while the aperture is set up to be POA/POI at 100 yards. Zeroing one zeroes the other. It was also noted that the large apertures found on traditional AR sights came about for snowflakes, and that they could be useful for those utilizing pro masks. A trick to get more utility out of them would be to drill them out and thread in carburetor ports. Also notable was that Paul shots nose to the charging handle, as it gives him a definite and repeatable index for his head position, since simply having a different head position can change one's zero.

I had originally zeroed my rifle for 50 yards with XM855 (was hoping to find a range with 200 meters to fine tune it, but it never happened); there was some changes in both elevation at this point to get the XM193 to print as needed.

After this rough zero, we moved all the way back to the 100 yard line, and went over prone. To get down, use the weak hand to help lower one's self down. Then, prop the rifle up using the weak arm elbow, while holding on firmly to the rail. The arm should be cranked in to help stabilize the gun; if one's arm touches the magazine, like Paul's does, don't worry about it, and it can even be seen as an index point to make sure one's arm is in far enough. Magazine monopoding is acceptable, but Paul notes that many people can't pull that off if they're in armor with magazines and other things up front, so it's not universal.

Also, something that was brought up was the fogging issues that might occur with optics, mostly for LEs, as they move the rifle from inside an air conditioned vehicle out into a hot, humid environment. For AFGs and VFGs, Paul notes that their usage can create consistency issues, since one would now have different weak hand positions for standing, kneeling, and prone. In terms of gear, RRA two stage triggers are not durable, while JP adjustable triggers have had issues with the adjustments working loose; Paul personally recommended only mil-spec and Geissele triggers. He is also not fond of single stage triggers, as they can be too light for tactical work. Paul also runs a bungee retention system on his weak side when he has a plate carrier, which helps keep the rifle out the way when he's trying to do other work. For this sling, he runs an adjustable two point, and has it mounted on the back of the stock and front of the receiver. For magnifiers, an AI stated that he didn't run them until he got to the 100 yard line; Paul recommended running the magnifier off until needed, as if there is enough distance to mount it, one is probably not in a huge amount of danger, but running with it on and stumbling upon something would be bad.

For the zero at 100 yards, my elevation was good, but my windage was a bit off. I used the monopod and used my sling to help stabilize the gun, since I was running slick. I found that Paul's method of using the elbows was indeed very stable, especially with the arms locked in, but still not quite as stable as monopoding with sling tension. The magnifier was rather useful here, especially since I had mild smearing of the dot, due to my eye.

After confirming everyone's zero, we then ran a quick drill. From the standing ready position, one needed to get to prone and engage the target 5 times. By Paul's standards, one has 20 seconds to do so; for anything at >100 yards, he would use this position. This was done 4 times.

I had two misses, which I suppose wasn't too bad for my first time. There was definitely some mild anticipation/trigger freeze issue, which can probably be overcome with dryfire. I also found Paul's breathing cadence quite helpful; he preferred to shoot on a "dead chest", after exhaling, so he would breathe in, breathe out, take the shot, breathe in, breathe out, take the shot, etc.

Next up was the kneeling position. Like kneeling with the pistol, this position can be more difficult due to each individual's body and gear selection. One first steps forward with the weak leg, with the weak foot in line with the strong foot, elbow goes toward the knee, and then all the way down. How far one steps forward is purely preference. It's important to not have the elbow exactly on the knee, as that can cause instability; instead, have it slightly forward or back of it, but not so much that one loses the bone-on-bone support. One can also bend the rear foot if need be. Paul and the AIs both noted that the kneeling position is probably the most difficult to shoot from. For the drill, one starts in the low ready while standing at 75 yards, goes down, shoots, then gets back up. This was run dry first, in order for each person to find their preferred position; as Paul likes to say, "if it doesn't feel good dry, you won't shoot well live".

I indeed found this to be far more difficult than the prone. I threw three shots total during the drill, out of roughly 20 rounds; the two that I didn't call were fairly close to within the target box, for whatever that's worth, enough so that the AIs stated that they would have been satisfied with that grouping. I kneeled in a way so that the top of my right foot was against the ground, something that not everyone could do, due to flexibility issues. I was still using my magnifier at this distance.

Paul then noted that, for the kneeling, one would have to practice it enough so that the act of getting down to the kneeling position would become second nature, and that one would end up in the correct position, without having to adjust. We then ran another set of kneeling drills, both at the 75 yard and the 50 yard; starting standing, get to the kneeling position, and then fire off 5 rounds.

I had a series of FTFs, one after the other, at the 75, although that was mostly because all I did was tap-rack-bang. Two of the rounds exhibited light primer strikes, while the third had no firing pin indentation at all; it was fed out of a PMag. I had lubed the rifle generously the night before, and the action felt quite smooth, but I was also running suppressed, and hadn't cleaned the BCG/CH for 73 suppressed shots before the class, and the rest of the rifle had never been cleaned. George suggested maybe there was fouling in the BCG binding up the firing pin; I had an extra BCM BCG, so I was ready to swap it out for that if this issue exhibited itself again. I ran about 10 rounds through the rifle after the 75 yard drill, into the berm, and had no issues. At the 50 yard, the rifle fired fine, though I did not; I threw out 3 shots out of the 25 shots fired.

At this point, 1115, we broke for lunch.
 

Default.mp3

Established
After lunch, we re-checked our zeros at 100 yards, using the prone. Paul also once again stressed the importance of consistency with one's positioning relative to the gun, making sure that the nose, cheek, ear pro, etc. are all in the same place each time, in each position, as changing any of that can cause a shift in zero. Also, Paul noted how he had put paint marks all over his rifles, such as on the receiver extension where the stock is, on the safety, on the iron sights adjustment screws, etc., so as to allow easy checking of whether or not something had changed positions. As for trying to maximize short resets, Paul has stated that a possible issue with that is having an unintended double tap, due to the recoil driving the gun forwards and back.

My zero held, although I did throw one shot.

After confirming the zero, we ran the prone drill one more time. It was then noted that consistency runs not just with one's handling of a weapon, but also what each weapon will have; Paul has all his carbines set up the exact same way, so he can just pull any one of them out the safe and not have to think about the idiosyncrasies of each carbine. In low-light situations, Paul states that a WML is a must; however, this also means that the WML must be accessible with the same grip one uses normally during the day. It is also very important to not search with a WML, which is a training scar he has seen quite a few times, as this ends up possibly muzzling a friendly.

The next drill was done at the 25 yard line, standing, with several dry runs before the live run; 5 shots into the spine box, with 8 seconds being the standard when starting from the low ready. When standing, the stance should be just as one would shoot a pistol. One can move one's feet to adjust the natural POA. After engaging, the safety goes on as soon as the muzzle is below the belt. Paul likened the stock to a hinge, meaning the stock does not move, but simply provides a pivot point, as one moves from the low ready to the shooting position and back. The post-shooting assessment is the same as the pistol, left-right-down with the muzzle, then to the low ready and a full scan. Paul noted here that when scanning people, he looks first at the face, then then hands, the belt, and lastly the demeanor. This is something that can be practiced in any public area, such as the local shopping mall or Wal-Mart.

I did decent here, with only 1 miss out of several iterations of the drill, although the weight of the weapon with a suppressor hanging off the end was made quite obvious here.

A question was raised here about just how low to depress muzzle during the full scan; some students had been taught to depress the muzzle just enough to see over the sights. Paul illustrated the weakness of this technique by having a student utilize that technique on him. The student could not see Paul's hands at his waist, as the weapon (verified unloaded with a chamber flag) was blocking his vision, which meant that he could not make a proper threat assessment on Paul (Paul had a fixed blade in his hand).

The next drill was one shot, from the low ready, at the 7 yard line, ideally within 1 second. Paul stressed for us to remember the offset at this distance (approximately 2.5 inches).

No real issues, besides the fact that the weight was getting extremely noticeable, enough so that I would take the weapon out of the low ready while waiting for the next iteration of the drill.

After the drill, the question of how to link-up with LEOs in the wake of an incident was posed. For something that happens at the house, what Paul currently does is have a set of strobes, one to throw in front of the house, and one in front of the room that he and his family will be holed up in. The strobes can be used to guide any responding LEOs in; hopefully, Paul will be able to get in touch with the responding LEO via the dispatcher, and just walk him in. He stressed that once the LEO is on scene, cache the weapon, so that the LEO does not first observe you with a weapon, as the LEO has no idea what they are suppose to be expecting. Follow all LEO instructions, but be sure to inform him if the house has not been properly cleared. The same basic principles also occur when outside the home, in the sense that one should cache the weapon after the threat has been taken care of, and there are responding LEOs.

We then went over transitions to sidearms. Paul advises that any time the long arm goes down (out of ammo, malfunction, etc.), and there are threats within 25 yards, transition to the sidearm. Paul uses the weak arm to sling the rifle toward the weak side, while drawing with the strong side. He stated that there is no need to attempt to safe the long arm, as it would be out of commission anyway, if one was transitioning. At this point, any time one's gun goes down for whatever reason during a drill, one was to transition to the sidearm and dry fire (as they would be dry). We then ran the next drill: 2 rounds into the spine box at 7 yards, running one full mag worth of the drill.

I was told that there was no need to safe the weapon during the left-right-down portion of the scanning. I also had yet another malfunction here, this time a failure to fully go into battery, again with a PMag using Independence 5.56. I replaced that PMag from my rotation, as I had been using essentially that one PMag for a large portion of the drills, as I would simply keep refilling it. The interior was filthy, so I wondered if that was the cause for the malfunctions. Regardless, no more malfunctions occurred after swapping out to cleaner magazines.

We then moved onto 2 rounds into the spine box, then 1 into the head, at 7 yards. It was noted that if trying to go fast, one should shoot into the upper portion of the spine box, as this would provide a slightly faster transition to the head. Also, most of important vital organs are in the upper chest anyway, so even in the real world it would be advantageous to do so. After that, we did 5 rounds into the spine box, then 1 into the head, which is Paul's standard failure drill against a single opponent; it was stressed, as usual, that one would be seeing 7 sight pictures with this drill. Paul stated that in his experience, he has seen people shoot fast enough that the threat was not able to even react to the lethal hits coming in.

After that, we then split the line in half to do transition drills. 2 shots onto each target, and like with the pistol, finger off the trigger during the transition, although there was no need to safe. Paul's standards call for a 3 second drill.

Even though there was no need to safe, I still found myself reflexively safing the weapon; not exactly a terrible problem to have, I suppose, given some other instructors' preferences on safety manipulation.

Finally, we went into the transition drill, with live rounds in the pistol. It was stressed that safety and mechanics were the goal for this drill, not speed. One round would be loaded into the rifle, so that the rifle would not pose any muzzling threat during the transition drill. One round would be fired from the rifle, then the transition to the pistol. This was done dry first, in order to have the AIs observe to see if three were any possible safety issues, before we ran it live.

My transitions were a little awkward, due to way I was running my sling. I had the sling mounted on the rear of the stock and the front of the forend, with the sling around just my neck, as this gave me greater flexibility, while still keeping the sling high on my body when slung without even having to use the quick adjustment. However, this meant that I had to finagle my weak arm through the sling first, which cost me a bit of time. Paul advised me to lengthen the sling, which I did after class.
 

Default.mp3

Established
Class ended here at 1500. Paul handed out certificates, along with CDs full of information, such as his standards, articles about various incidents or tactics, etc. He also gave us a couple of practice tips, such as the utilization of reduced sized targets for dry fire practice at home, which is quite useful from a trigger control POV, though not so much for recoil control.

I was a bit disappointed by my 25 yard pistol shooting; I will need to put more emphasis on that in the future. I was also disappointed by my mediocre carbine accuracy performance, even when there was no time limit. I will definitely need to put much more dry fire practice in.

As for the class itself, the only thing I found disappointing was the lack of rifle speed reloading instructions, although I can see it being fairly low in priority, given that one could argue that speed reloads are of minimal use when one should be transitioning to the sidearm if speed was of that much importance. Beyond that, I found Paul's idea of teaching techniques that work for both slick and jocked up to be very enlightening. I also found the many discussions that arose organically to be quite useful. Finally, the standards he gave us will probably see a fair bit of use in the future from me.

Gear-wise, I will have to see what caused the issues with the Monarch 9mm; I have run large amount of steel through the P30LS before, and never had this issue. Beyond that, the pistol side of things was fine; I never found the gloves to be a real impediment beyond the occasional failure to lock back on empty and some unfamiliarity with the trigger while gloved. On the carbine side of things, I found the current setup to be too heavy for comfort, as I ran the entire course suppressed. I have since removed all the Noveske Keymod rail covers, along with the Keymod rail piece and RVG, and am now just using the SR07 switch as an index point for my thumb, and the weight difference, while not huge, is still noticeable (I eagerly await when my Form 1 comes back so I can SBR this lower). I have since also tried the new BCM Keymod VFG Stubby, along with an IWC Keymod handstop, but neither provided an appreciable amount of difference in just shooting. I may put them back on as ways to help control the gun against barricade, but for now, since I have not really learned how to do so, I will keep them off. As for the sling, it is currently long enough for me to run it comfortably with my weak arm inside of it, so there's no need for gymnastics to transition and have the rifle lay on my body; it does go a little low, but is acceptable, and I can always cinch it up if moving. As for the malfunctions, I'm inclined to think it was due to a blown primer, as I found an expended one inside the carbine a couple days after the class while doing dry manipulations (the primer ended up locking up my safety).

Overall, 294 rounds of 9mm were expended, 81 of which were Monarch Steel 115. gr., 136 were Freedom Munitions 115 gr. RN New, and 77 were Freedom Munitions 115 gr. RN. 240 rounds of 5.56/.223 were expended, 38 of which were Monarch Steel 55 gr. FMJ (.223 Rem.), and 202 were Independence XM193I (5.56 NATO). All malfunctions in the pistol occurred with the Monarch Steel, while all malfunctions with the carbine occurred with the Independent XM193I.
 

ScottPM09

Member
Solid AAR! I went through a CSAT course (Adv. SWAT) late in 2013 and have been yearning to go back. Since I have not been over there in quite some time, I wanted to reiterate what you said in reference to, "He also stressed that once one takes a course with him, the student is free to contact Paul via email for any kind of question, and he would generally respond within 24 hours, depending on his workload at the time". The following year after I took the course, I still was coming up with questions or needed reminders on some of the things taught, particularly with planning operations and gathering building plans for raids.

Every single email I sent off received a solid response with thoughtful information in a timely manner. No one-liners or half-assed answers. One of his adjunct instructors (?Rich?) even sent me over a template that he uses and walked me through it.
 

Dave J

Newbie
I did not particularly like Paul's method of chamber checking, as I had a habit of pulling the charging handle a bit too much, and thus ejecting the round. Perhaps it'll get easier with practice, but I didn't really see an advantage over simply ejecting the magazine and checking to see if a round had been stripped.

FWIW, Paul once stated that he preferred the "brass check" method to avoid the risk of not fully seating the magazine after the top round crossover check. However, I also observed him teaching the crossover check to a shooter that did not have a forward assist upper, so I don't think he considers it an invalid technique.

To avoid pulling the charging handle back too far, the method I adopted is basically to hold my arm still, with my forearm touching the stock, and actuate the charging handle by bending my finger joints only. IMHO, this makes it easier to avoid "overdoing" the charging handle, either ejecting the round, or inducing a malfunction.

The other advantage is that it's useful for checking the status of an already loaded weapon, if the need arises.

Great AAR, BTW!
 
Top